Computers
How to Seamlessly Integrate Outlook with Your Workflow?

In today’s fast-paced work environment, managing emails, scheduling meetings, and staying on top of tasks can be overwhelming. Microsoft Outlook offers a powerful solution to streamline your daily workflow and increase productivity. This article will guide you through the process of seamlessly integrating Outlook into your work routine, helping you make the most of this versatile tool.
Key takeaways:
- Set up email filters to organize your inbox
- Use Outlook’s calendar for efficient meeting scheduling
- Manage multiple work accounts in one place
- Customize your Outlook workspace for better efficiency
- Integrate Outlook with other apps to create a unified workspace
- Utilize Outlook’s task management features
Setting Up Email Filters
One of the best ways to keep your inbox organized is by setting up email filters. These filters, also known as rules, automatically sort incoming messages based on criteria you define. Here’s how to create a filter:
- Go to the “Rules” tab in Outlook
- Click on “Manage Rules & Alerts”
- Choose “New Rule”
- Set your criteria (e.g., sender, subject, keywords)
- Choose an action (e.g., move to a folder, mark as read)
By using filters, you can ensure that important emails don’t get lost in the clutter. For example, you could create a rule that moves all emails from your boss to a high-priority folder.
Streamlining Meeting Scheduling
Outlook’s calendar feature is a game-changer when it comes to scheduling meetings. Instead of going back and forth with emails to find a suitable time, you can use Outlook to streamline the process:
- Open your Outlook calendar
- Click “New Meeting”
- Add attendees, set the date and time
- Include any necessary information or attachments
Pro tip: You can schedule meetings directly from an email. Just right-click on the message, select “Quick Steps,” and then “New Meeting.” This way, the email content is automatically included in the meeting invite.
For managers, this feature is particularly useful for quickly setting up team meetings or one-on-ones. Sales professionals can use it to efficiently schedule client calls and follow-ups.
Managing Multiple Work Accounts
If you’re juggling multiple work accounts, Outlook has got you covered. You can add and manage several accounts within a single interface. Here’s how:
- Click “File” in Outlook
- Select “Add Account”
- Enter your email address and connect
- Provide your credentials
- Repeat for additional accounts
Once set up, you can view all your accounts in a unified inbox or keep them separate in individual folders. This feature is a real time-saver, eliminating the need to switch between different email clients.
Customizing Your Outlook Workspace

Make Outlook work for you by customizing your workspace. You can change the layout, color scheme, and even add shortcuts for frequently used features. Some customization options include:
- Creating custom email signatures
- Setting up automatic replies
- Configuring notification settings
By tailoring Outlook to your preferences, you can create a more efficient and enjoyable user experience.
Integrating Outlook with Other Apps
Outlook plays well with others! You can integrate it with various third-party applications to create a unified workspace. Some popular integrations include:
- Project management tools (e.g., Asana, ClickUp)
- Customer Relationship Management (CRM) software
- Task management apps
- Microsoft Teams for seamless communication
- OneNote for note-taking and collaboration
For example, by integrating Outlook with Slack, you can respond to meeting notifications and update your status automatically based on your calendar events. Salespeople can benefit from CRM integrations, allowing them to track client interactions directly from their inbox.
When integrating Outlook with other apps, it’s important to consider data privacy and security. Always review the permissions requested by third-party apps and ensure they comply with your organization’s security policies. Use strong, unique passwords for each integration and enable two-factor authentication where possible.
Maximizing Productivity on Mobile Devices
Don’t let being away from your desk slow you down. The Outlook mobile app allows you to access your emails, calendar, and contacts on the go. Some handy features include:
- Push notifications for important emails
- Swipe gestures for quick actions
- Seamless sync with your desktop Outlook account
With the mobile app, you can respond to urgent emails, schedule meetings, and stay on top of your work responsibilities from anywhere.
Utilizing Outlook’s Task Management Features
Outlook’s task management capabilities can significantly enhance your workflow. Here’s how to make the most of them:
- Create tasks: Click on the Tasks icon, then “New Task”
- Set due dates and reminders
- Categorize tasks for easy organization
- Flag emails as tasks for follow-up
For administrators and project managers, the ability to assign tasks to team members and track progress can be invaluable. You can even create recurring tasks for regular duties, ensuring nothing falls through the cracks.
Troubleshooting Common Outlook Issues
Even the best tools can have hiccups. If you run into issues with Outlook, try these basic troubleshooting steps:
- Restart the program
- Reboot your computer
- Check for and install any available updates
- Repair your Outlook installation
If these steps don’t solve the problem, don’t hesitate to reach out to Microsoft’s support team or consult online forums for more specific solutions.
Best Practices for Efficient Email Management
To make the most of Outlook, consider adopting these best practices:
- Prioritize your emails: Use categories or labels to mark urgent messages
- Create a consistent filing system: Organize your emails into folders for easy retrieval
- Regularly update your passwords: This helps keep your accounts secure
- Use the “Two-Minute Rule”: If an email takes less than two minutes to respond to, do it immediately
By following these tips, you can keep your inbox under control and your workflow smooth.
Conclusion
Integrating Outlook into your workflow can significantly boost your productivity and help you stay organized. From managing multiple accounts to scheduling meetings, customizing your workspace, and utilizing task management features, Outlook offers a wealth of tools to streamline your daily tasks. By taking advantage of these features and following best practices, you can transform your work routine and achieve inbox zero with ease.
Remember to always prioritize data privacy and security, especially when integrating with third-party apps. With Outlook as your central hub for communication and task management, you’ll be well-equipped to tackle your workday efficiently.
FAQs
Can I use Outlook on my phone?
Yes, Outlook has a mobile app available for both iOS and Android devices.
How can I stop receiving notifications for every email?
You can customize your notification settings in Outlook to only receive alerts for important messages.
Can I use Outlook with non-Microsoft email accounts?
Absolutely! Outlook supports various email providers, including Gmail and Yahoo.
How do I create an email signature in Outlook?
Go to File > Options > Mail > Signatures to create and manage your email signatures.
Can I schedule emails to be sent later in Outlook?
Yes, you can use the “Delay Delivery” feature to schedule emails to be sent at a specific time in the future.
Remember, mastering Outlook is a journey. Start by implementing one or two features at a time, and soon you’ll be navigating your workday with increased efficiency and less stress. Happy emailing!
Read more:https://techsupz.com/extend-my-bluetooth-range-on-android-devices/

Have you ever felt that sinking feeling when you try to open a recovery file, only to find it won’t budge? It’s like being locked out of your own digital treasure chest. Don’t worry, you’re not alone in this frustrating situation. Many PC users and others face this head-scratching problem. In this article, we’ll dive into why your recovery file might be playing hard to get, and more importantly, how you can crack it open.
What Are Recovery Files and Why Are They Important?
Before we dive in, let’s quickly cover what recovery files are. Recovery files are like digital safety nets. They’re copies of your important data that your computer or software creates automatically or when you manually back up your work. These files (often with extensions like .bak, .tmp, or .old) can be lifesavers when your original files get corrupted or accidentally deleted.
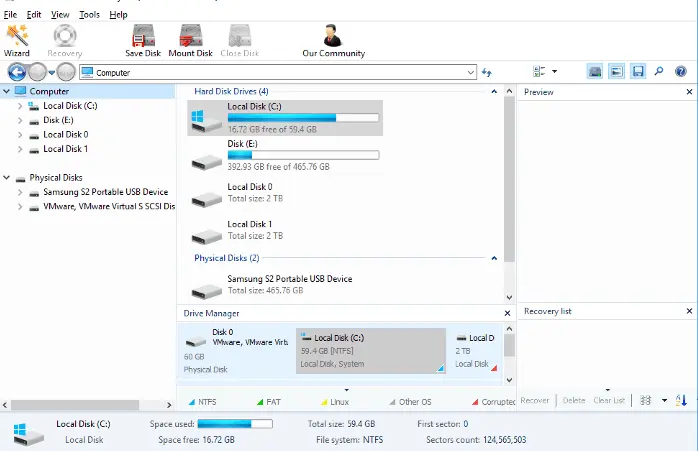
image by hetmanrecovery
Creating recovery files is a crucial practice in our digital age. It’s like having a spare key for your house – you hope you never need it, but you’re incredibly grateful when you do. Now, let’s explore why these digital lifelines sometimes refuse to cooperate.
How to Identify If Your Recovery File Is Corrupt
Before we jump into fixing the problem, it’s important to know if your recovery file is actually corrupt or just not opening. Here are a few signs:
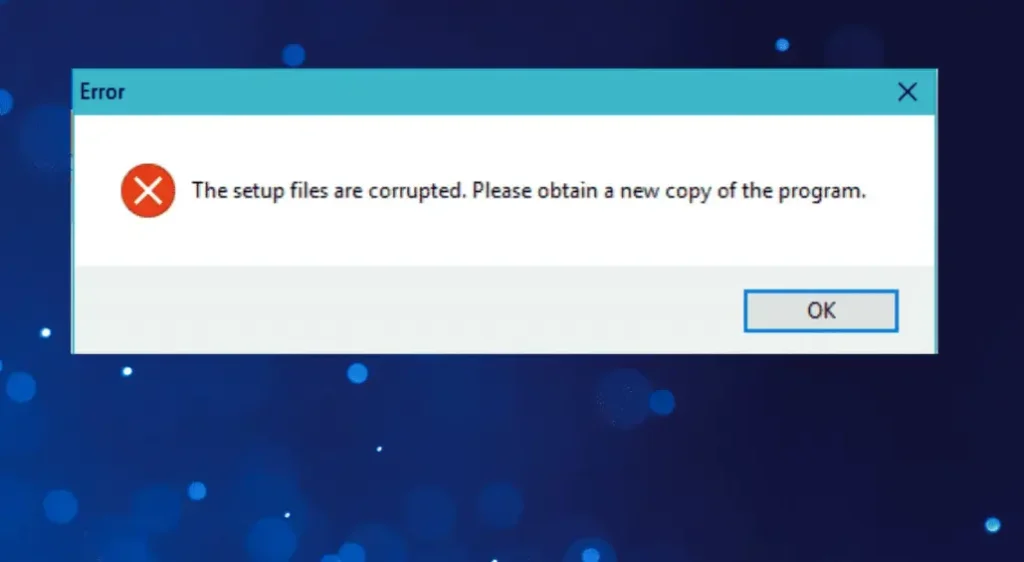
image by windowsreport
- Error messages when trying to open the file
- The file appears to be empty when opened
- The file size is unusually small or large
- The file extension has changed
- The file opens but contains garbled text or distorted images
If you notice any of these signs, your recovery file might be corrupt. But don’t panic – we’ve got solutions coming up!
Common Reasons Why Recovery Files Won’t Open
Let’s start by looking at the usual suspects behind this digital door-slamming:
File Corruption: The Silent Killer
Imagine your recovery file as a jigsaw puzzle. File corruption is like someone coming along and messing up the pieces. This can happen due to:
- Sudden power outages
- Improper shutdowns
- Hardware hiccups
When parts of the file get jumbled or go missing, your computer scratches its head, unable to piece it all together.
Software Compatibility Issues: The Language Barrier
Sometimes, it’s not the file that’s the problem, but the software trying to read it. It’s like trying to read a book in a language you don’t understand. This can happen if:
- You’re using outdated software
- The recovery file was created with a newer version of a program
- You’re trying to open the file with the wrong type of software
Incorrect File Formats: The Square Peg in a Round Hole
Ever tried to fit a square peg in a round hole? That’s what happens when you try to open a file with the wrong format. This can occur if:
- The file extension got changed accidentally
- The recovery process altered the file format
- You’re using software that doesn’t support the file type
Encryption Problems: The Digital Lock
Some recovery files come with their own security system – encryption. If you’ve forgotten the password or the encryption got messed up during recovery, you’re basically locked out of your own file.
Incomplete Recovery Process: The Half-Baked Cookie
If the recovery process got interrupted – maybe your computer decided it was nap time in the middle of the job – you might end up with a half-recovered file. It’s like trying to eat a half-baked cookie – not very satisfying.
System Resource Limitations: The Overworked Computer
Sometimes, your computer might be too busy or too tired to open large recovery files. This can happen if:
- Your computer is running low on memory
- The hard drive is almost full
- Too many programs are running in the background
How to Fix Recovery Files That Won’t Open
Now that we know the ‘whys’, let’s roll up our sleeves and look at the ‘hows’ of fixing this problem:
Try Different Software or Devices
Sometimes, all your file needs is a change of scenery. Try opening it on a different computer or with alternative software. It’s like asking for a second opinion – sometimes a fresh pair of eyes (or in this case, a different program) can do the trick.
Use Professional File Repair Tools
When home remedies don’t cut it, it’s time to call in the pros. Professional file repair tools are like digital doctors for your files. They can often fix corruptions and get your file back on its feet. Some popular and reputable options include:
These tools can work wonders, but remember to download them from trusted sources to avoid inviting more problems to the party.
Convert File Formats
If the file format is the issue, try converting it to a more common format. There are many free online converters available, such as Zamzar or CloudConvert. It’s like translating a book into a language you understand – suddenly, everything makes sense!
Check for Software Updates
Keeping your software up-to-date is like giving your computer a regular health check-up. Outdated software can sometimes struggle with newer file types. So, make sure you’re running the latest versions of your programs.
Scan for Malware
Sometimes, the villain in this story is a virus or malware. Run a thorough antivirus scan on your system using reputable antivirus software like Avast, Bitdefender, or Malwarebytes. It’s like giving your computer a good clean – you might be surprised at what’s been lurking in the corners!
Restore Previous Versions
Windows has a nifty feature that sometimes keeps older versions of files. Right-click on the file, go to ‘Properties’, then the ‘Previous Versions’ tab. You might find an earlier, working version of your file there. It’s like time travel for your documents!
Preventing Future Recovery File Issues
An ounce of prevention is worth a pound of cure, right? Here’s how to keep your recovery files in tip-top shape:
Regular Backups: Your Digital Safety Net
Get into the habit of backing up your important files regularly. It’s like having a spare key – you hope you never need it, but you’re glad it’s there when you do. Use external hard drives, cloud storage services like Google Drive or Dropbox, or both for extra peace of mind.
Proper File Handling: Treat Your Files with Care
Be gentle with your files. Always use the ‘Safely Remove Hardware’ option before unplugging external drives. It’s like saying “goodbye” politely instead of slamming the door on your way out.
Keeping Software Updated: Stay Current, Stay Safe
We mentioned this before, but it’s worth repeating. Keep your software updated. It’s like giving your computer a regular oil change – it keeps everything running smoothly.
Using Reliable Recovery Tools: Choose Your Weapons Wisely
When you need to recover files, use trusted, well-reviewed recovery tools. It’s like choosing a good locksmith – you want someone who can open the door without breaking it.
When to Seek Professional Help
Sometimes, despite your best efforts, you might need to call in the cavalry. Consider seeking professional help if:
- The file contains critically important data
- You’ve tried all the above solutions without success
- You’re dealing with physically damaged storage devices
Professional data recovery services have specialized tools and clean room environments. They’re like the special forces of the digital world – equipped to handle the toughest cases.
FAQ
Why won’t my recovery file open after using data recovery software?
This can happen due to incomplete recovery, file corruption during the process, or compatibility issues with the recovery software. Try using a different recovery tool or opening the file with alternative software.
Can a virus prevent my recovery file from opening?
Yes, malware or viruses can corrupt files or prevent them from opening. Run a thorough antivirus scan on your system and the recovery file itself.
How can I prevent my recovery files from becoming corrupt in the future?
Regular backups, proper shutdown procedures, using surge protectors, and handling files carefully can help prevent corruption. Also, keep your software and operating system updated.
Is it possible to open an encrypted recovery file if I’ve forgotten the password?
It’s challenging but not always impossible. Some specialized software can attempt to crack the encryption, but success isn’t guaranteed. In some cases, you might need professional help.
Why do some recovered files appear blank when opened?
This can occur due to severe corruption or incomplete recovery. The file structure might be intact, but the actual data could be missing. In such cases, try using professional file repair tools.
Conclusion
Dealing with recovery files that won’t open can feel like being locked out of your own digital home. But armed with the knowledge of why this happens and the tools to fix it, you’re now ready to be your own digital locksmith. Remember, the key to avoiding these issues lies in regular backups, careful file handling, and keeping your digital environment healthy and up-to-date.
By following the tips and solutions we’ve discussed, you’ll be well-equipped to handle most recovery file hiccups. And when all else fails, don’t hesitate to call in the pros. Your important data is worth the effort!
Stay safe in your digital adventures, and may all your files open smoothly from here on out!
Read more:https://techsupz.com/disable-double-tap-on-my-motorola-phone/

Are you frustrated by the ‘install_failed_test_only’ error message you received when trying to install a program or application on your device? In this article, we will explore why this error occurs and what steps you can take to troubleshoot and resolve it. From understanding the root cause of the error to determining the potential solutions, we’ve got you covered with all the information you need to successfully overcome this obstacle.
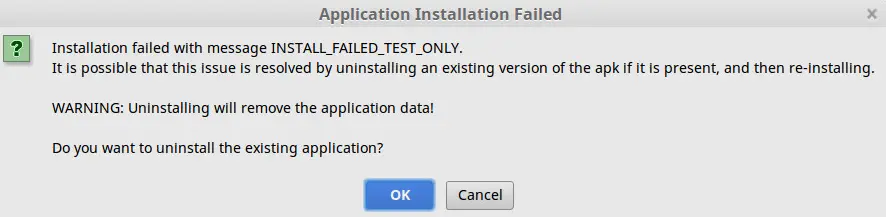
What is the ‘install_failed_test_only’ error message?
The ‘install_failed_test_only’ error message typically occurs when you are trying to install an application that is designated as a test-only package. This means that the application is not intended for general use and is only meant to be installed and run in a testing environment. When you try to install a test-only package on a non-testing device, you will encounter this error.
Test-only packages are often used by developers to test out new features or functionalities before releasing them to the general public. These packages may contain incomplete code, experimental features, or other elements that are not suitable for regular use. As a result, the Android system blocks the installation of test-only packages on non-testing devices to prevent potential issues or conflicts.
Why did my install fail with the ‘install_failed_test_only’ error?
There are several reasons why you may encounter the ‘install_failed_test_only’ error when trying to install an application. One common cause is that the application you are trying to install is a test-only package that is not intended for general use. This could be due to a mistake in the installation process, such as selecting the wrong package or attempting to install a test-only version of an application that is meant for testing purposes only.
Another possible reason for the error is that your device is not set up for testing, which can prevent the installation of test-only packages. If your device is not configured to allow installation of test applications, the system will block the installation and display the ‘install_failed_test_only’ error message.
How can I troubleshoot and fix the ‘install_failed_test_only’ error?
If you encounter the ‘install_failed_test_only’ error when trying to install an application, there are a few steps you can take to troubleshoot and resolve the issue. One option is to check the type of package you are trying to install and ensure that it is not a test-only package. If the application is intended for general use, you should be able to install it without any issues.

Another solution is to configure your device for testing by enabling developer options and allowing installation of test applications. By enabling developer options and enabling USB debugging, you can set up your device to allow the installation of test-only packages and bypass the ‘install_failed_test_only’ error.
Can I bypass the ‘install_failed_test_only’ error and install the application?
While it is possible to bypass the ‘install_failed_test_only’ error and install a test-only package on your device, it is not recommended. Test-only packages are not intended for general use and may contain incomplete or experimental code that could cause issues or conflicts on your device. It is always best to only install applications that are meant for regular use and avoid bypassing system restrictions that are in place for a reason.
If you still want to install the test-only package despite the potential risks, you can try enabling developer options on your device and allowing the installation of test applications. Keep in mind that bypassing system restrictions and installing test-only packages may void your device warranty or lead to other unforeseen consequences.
Conclusion
In conclusion, the ‘install_failed_test_only’ error message occurs when you try to install a test-only package on a non-testing device. This error is a security measure designed to prevent potential issues or conflicts that may arise from running test applications on regular devices. By understanding the root cause of the error and following the troubleshooting steps outlined in this article, you can successfully overcome the ‘install_failed_test_only’ error and install the desired application on your device.
FAQs
1. Can I install test-only packages on my device?
Test-only packages are not intended for general use and may cause issues or conflicts on your device. It is recommended to only install applications that are meant for regular use to prevent potential problems.
2. Why am I seeing the ‘install_failed_test_only’ error message?
The ‘install_failed_test_only’ error occurs when you try to install a test-only package on a non-testing device. This error is a security measure to protect your device from potential issues or conflicts.
3. How can I enable developer options on my device?
To enable developer options on your device, go to the Settings menu, select About Phone, and tap on the Build Number multiple times until you see a message confirming that developer options have been enabled.
4. Will bypassing the ‘install_failed_test_only’ error void my device warranty?
Bypassing system restrictions and installing test-only packages may void your device warranty or lead to other unforeseen consequences. It is best to avoid bypassing security measures put in place by the Android system.
5. Is it safe to install test-only packages on my device?
Test-only packages are not intended for general use and may contain incomplete or experimental code that could cause issues on your device. It is always best to stick to installing applications that are meant for regular use to ensure the stability and security of your device.
Read more:https://techsupz.com/why-didnt-the-resource-call-close/

In this article, we will discuss the reasons why org.json.JSONObject cannot be directly converted to org.json.JSONArray in Java. We will explore the differences between these two JSON data structures and explain the challenges that arise when trying to convert one to the other. By understanding these limitations, developers can effectively work with JSON data in their Java applications.
Why can’t org.json.JSONObject be converted to org.json.JSONArray?
JSON (JavaScript Object Notation) is a popular data interchange format used in web development. In Java, the org.json library provides classes like JSONObject and JSONArray to work with JSON data. While both JSONObject and JSONArray represent JSON objects, they have distinct differences in structure and usage.
A JSONObject is an unordered collection of name/value pairs, where each name is a string and each value can be a string, number, boolean, JSON object, or JSON array. On the other hand, a JSONArray is an ordered sequence of values, which can include strings, numbers, booleans, JSON objects, or JSON arrays.
Due to these differences in structure, directly converting a JSONObject to a JSONArray is not a straightforward task. While you can iterate over the keys of a JSONObject and add each key-value pair to a new JSONArray, this may not always produce the desired result, as the order of the elements may not be preserved.
What are the challenges in converting JSONObject to JSONArray?

One of the main challenges in converting a JSONObject to a JSONArray is the difference in the underlying data structures. Since a JSONObject is a collection of key-value pairs, there is no inherent order to the elements. On the other hand, a JSONArray maintains the order of its elements, making direct conversion between the two problematic.
Another challenge arises from the fact that a single JSONObject can contain multiple types of values, such as strings, numbers, booleans, and nested JSON objects or arrays. When converting such a complex JSONObject to a JSONArray, it becomes difficult to preserve the hierarchical structure and relationships between the elements.
Furthermore, when converting a JSONObject to a JSONArray, it is essential to consider how the JSON data will be used and accessed afterwards. If the original data contained nested objects or arrays, simply converting it to a flat JSONArray may result in loss of information and make it harder to work with the data in a meaningful way.
Is there a way to convert JSONObject to JSONArray?
While there is no direct method to convert a JSONObject to a JSONArray in the org.json library, developers can achieve the desired result by iterating over the key-value pairs of the JSONObject and constructing a new JSONArray that reflects the desired structure. This process involves creating a new JSONArray, iterating over the keys of the JSONObject, and adding the key-value pairs as objects to the new JSONArray.
By carefully mapping the key-value pairs from the JSONObject to objects in the JSONArray, developers can preserve the structure and order of the data. However, it is essential to consider the potential loss of information when converting a complex JSONObject to a flat JSONArray, as some nested elements may need to be flattened or restructured to fit the new format.
Can JSONArray be converted to JSONObject?
Similar to converting a JSONObject to a JSONArray, there is no direct method in the org.json library to convert a JSONArray to a JSONObject. However, developers can achieve this by creating a new JSONObject and iterating over the elements of the JSONArray to add them as key-value pairs to the new JSONObject.
When converting a JSONArray to a JSONObject, developers should be mindful of the order of the elements in the array and how they will be mapped to keys in the new JSONObject. Additionally, nested arrays or objects within the original JSONArray may require restructuring to fit the flat key-value pair format of a JSONObject.
Conclusion
In conclusion, the direct conversion of org.json.JSONObject to org.json.JSONArray poses challenges due to the differences in structure and order of elements between the two JSON data structures. While there are ways to work around this limitation by manually iterating over the elements and constructing a new JSON array, developers should be aware of potential data loss and restructuring implications when performing such conversions.
FAQs
1. Can you directly convert JSONObject to JSONArray?
No, there is no direct method for converting a JSONObject to a JSONArray in the org.json library. Developers need to manually iterate over the key-value pairs of the JSONObject and construct a new JSONArray to reflect the desired structure.
2. How do you convert a JSONArray to a JSONObject?
Similar to converting a JSONObject to a JSONArray, there is no direct method to convert a JSONArray to a JSONObject. Developers can achieve this by iterating over the elements of the JSONArray and adding them as key-value pairs to a new JSONObject.
3. What are the differences between JSONObject and JSONArray?
A JSONObject is an unordered collection of key-value pairs, while a JSONArray is an ordered sequence of values. JSONObject can contain strings, numbers, booleans, JSON objects, and JSON arrays, while a JSONArray can only contain strings, numbers, booleans, JSON objects, and JSON arrays.
4. Why is preserving the structure important when converting JSON objects?
Preserving the structure of JSON objects is important because it ensures that the relationships between elements are maintained, and the data can be accessed and manipulated correctly. Without preserving the structure, there is a risk of losing information or making it harder to work with the data effectively.
5. What should developers consider when converting JSON data between different formats?
When converting JSON data between different formats, developers should consider the underlying structure of the data, the order of the elements, and any nested objects or arrays that may need to be flattened or restructured. It is crucial to plan the conversion process carefully to avoid loss of information and ensure the integrity of the data.
Read more:https://techsupz.com/why-wont-my-s22-send-pictures/

What Can Com Samsung Android App TelephonyUI Do for You?

How Does Com TCT Dialer Improve Communication Efficiency?

How can I safely remove system data from my Android device?

Why Won’t Your Android Alarm Turn Off?

Is com.lge.icecontacts the Easiest Way to Manage Your Contacts?

What Can Com Samsung Android App TelephonyUI Do for You?
In this article, we will explore the functionalities of the Com Samsung Android App TelephonyUI and how it can enhance...

How Does Com TCT Dialer Improve Communication Efficiency?
Description: This article discusses how Com TCT Dialer can improve communication efficiency in businesses. It will delve into the features...

How can I safely remove system data from my Android device?
Are you running out of space on your Android phone? Is your device slowing down? You might need to remove...

Why Won’t Your Android Alarm Turn Off?
What to do when your Android alarm won’t turn off? In this article, we will explore the possible reasons why...

Is com.lge.icecontacts the Easiest Way to Manage Your Contacts?
In this article, we will discuss the features and benefits of using com.lge.icecontacts as a contact management tool. We will...


How do I factory reset my Nokia C100 in a few easy steps?
Description: This article will guide you through the process of factory resetting your Nokia C100 in just a few easy...


Why Won’t My Recovery File Open? Common Causes and Solutions
Have you ever felt that sinking feeling when you try to open a recovery file, only to find it won’t...


What Does Open Channel for BiP Mean?
Description: In this article, we will discuss the concept of open channel for BiP, its significance in technology, and how...


How can I disable double tap on my Motorola phone?
In this article, we will discuss how you can disable the double tap feature on your Motorola phone. Double tap...


Looking to Save Messages on Your Samsung? Here’s How to Save Them to Your SIM Card
Description: In this article, we will discuss how to save messages on your Samsung device by transferring them to your...
-

 Mobile Phones5 months ago
What is ACS Notification on My Phone?
-

 Mobile Phones2 months ago
What is com.qualcomm.qti.device statistics service and how does it affect your device?
-

 Mobile Phones2 months ago
What is com.qualcomm.qti.remotesimlockauth?
-

 Mobile Phones2 months ago
How can you check the last factory reset date on your device?
-

 Mobile Phones6 months ago
What is the Shell App on Android?
-

 Mobile Phones6 months ago
How Does the Samsung Android App SmartCapture Work?
-

 Computers5 months ago
Which is better: XMP 1 or XMP 2?
-

 Computers7 months ago
Who is Chongqing Fugui Electronics Co?